Thursday, September 20, 2012

WebGL Volumetric Renderer


Live code: iamnop.com/volumetric
(Does not run Windows. Unknown bug with shader compiling.)

Video: http://www.youtube.com/watch?v=VPhnwOpmUqY

GitHub: https://github.com/nopjia/WebGL-Volumetric

As a small side project, I implemented volumetric ray casting in WebGL. The idea is to ray cast a 3D texture, which should be very fast since OpenGL texture lookups are highly optimized; however, this is not doable since 3D textures are not allowed in WebGL.

During SIGGRAPH 2012, I met Luis Kabongo from VICOMTech, who showed me their implementation of a WebGL volume renderer, which they use for medical imaging. They made it possible by, instead of using a 3D texture, using a 2D texture atlas, which is made up of 2D texture slices. This is a very simple solution. I immediate took this idea and implemented my own version.

VICOMTech's volume renderer is for simply viewing 3D datasets, so they implemented it using alpha compositing with no lighting.

I took it a step further for my own renderer and implemented physically-based volume rendering. The lighting model is based on light transmittance. I introduced multiple lights into the scene and use exponential fall-off to calculate transmittance.

As a result, the renderer features physically-based lighting, volumetric shadows, and support for multiple lights. The results turned out very nicely.

Tuesday, September 18, 2012

CodeDJ Live!

Live code here.
(Only works on Firefox, since it uses Audio Data API.)
The app is not most intuitive and has a tiny learning curve.
Please refer to more info section.

Video: http://www.youtube.com/watch?v=bl11T112Jn0


A project I did for the PennApps 48-hour hackathon.

About
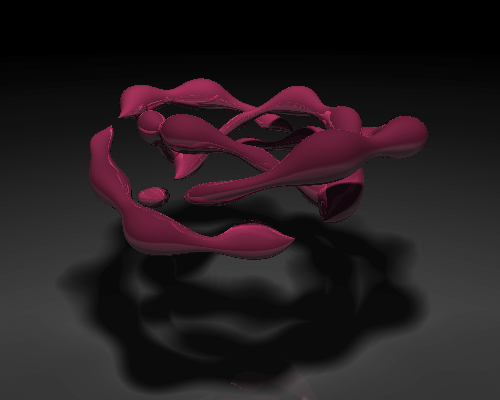
CodeDJ Live! is a web-based app for programmers to code up visuals in real-time as the music plays. With this app the programmer becomes a Visualizer DJ who produces stunning visuals at a party.

The app is inspired by Iñigo Quilez and his live code demos at SIGGRAPH 2012 Real-time Live event. Similar examples can be seen here and here.

Technical Overview
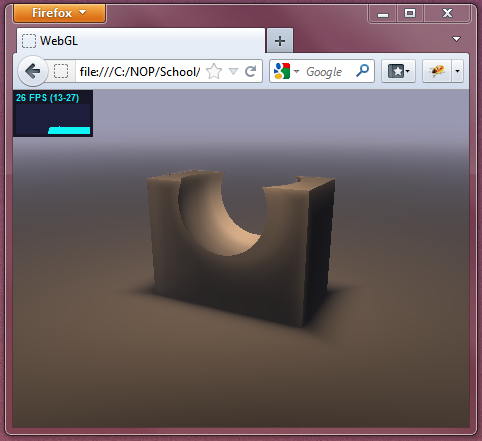
This app is essentially a WebGL GLSL live coder hooked up to audio spectrum analyzer. The user has access to the GLSL code that is producing the visuals, which can be compiled instantly and displayed.

Technical Details

Music Analyzer
Audio frequency analysis is done using Mozilla's Audio Data API and fast-Fourier transform functions, provided by [blank]'s signal processing library. The Audio Data API provides access to the framebuffer, which contains the decoded audio sample data. This data is fed into the fast-Fourier transform to extract  spectrum frequency data. Frequency data has 1024 channels. This is way too many for the use of this app and needs to be reduced to a manageable and meaningful number. The higher half of the frequencies are barely noticeable, so they are ignored. The lower half are kept and averaged down to 8 channels total for the user to use.

Music Access
Audio Data API requires access to the audio framebuffer data, which is sensitive secured data access. A limitation to this is the "same origin policy", which means it cannot access audio data outside the same root website. This becomes a problem since users need to be able to use their own music for this app. A solution is to host the web app on a public directory on my personal Dropbox, and have users provide their music using their own Dropbox. This is done through the Dropbox javascript API. This works because now the web app and any user provided files are all within the same root website, which is dropbox.com.

Music Streaming
The user logs in through Dropbox API and specifies which folder to contains the music files. Only .ogg and .wav files are accepted, as determined by Mozilla Firefox. Once the user has selected a folder, no music files are downloaded or transferred. Instead, public URLs of the files are generated and stored within the app for that session. These URLs expire within 4 hours. The audio is then streamed per file as they are needed, using the URL. The app does not load more than one audio file at any time.

Visuals Shader
Visuals are generated using a fullscreen quad and a fragment shader. Audio frequency levels are passed into this shader as uniforms. The GLSL code generating the visuals is exposed through a large text editor, where the code can be edited and compiled in real-time to be displayed on the screen.

Postprocessing Shader
Finally, the visuals go through a post-processing shader which applies a series of custom effects to produce dance-club-like styles. This includes over-saturation, bloom, box-blur, and film grain.

Tuesday, April 24, 2012

Some Nice Images

Just throwing up some nice rendered screenshots. 
Click to see full-size (500x400).


Sunday, April 22, 2012

Another Experimental Feature

Decided to throw in another fun experimental feature.

The Displaced Bumps option displaces the distance function according to an arbitrary function (in this case a simple sin wave). It doesn't work very well with square shapes. However, it works great with round box, and it creates a very interesting shape with the knot.


Coding Done! (for now)

Worked straight 10 hours today. I think I have reached a point where I am satisfied with the code.

A huge improvement is a user interface for selecting options. To bring up the GUI, press "Shift+Q". The code is live at www.seas.upenn.edu/~pjia/raymarch (since unfortunately iamnop.com is still having issues.) If you are running this, remember to resize your browser to a smaller size for reasonable performance.

Here's what it looks like now:


Aside from fixing corner cases and doing optimizations, here are the new features implemented:
  • New GUI! (of course!)
  • Mirrored reflections.
  • New more realistic soft shadows method, based on technique by the.savage. 
  • New fog. Not really fog anymore. It simply darkens the color relative to distance marched. Takes care of the far distances where numerical errors are large. 
  • Focal blur, which is basically dithering based on distance. This is implemented last minute and doesn't produce very good results. 
And of course, the project is not complete, and there are a few known bugs:
  • Ambient Occlusion and Subsurface Scattering stops working when warping is turned on. 
  • As mentioned, focal blur at this moment is an experimental and unfinished feature. To improve, I will need to take several dithered samples and average between them. However, this will hurt performance.
  • The quaternion fractal does not render quite well with all modes, since I'm trying to optimize across all types of scenes, balancing quality and performance. The current smoothing level doesn't work quite well for the fractal, so there will be breaks in the surface. It's also running at a few iterations, so it seems to leave artifacts across the scene. I'm just putting it in there as an example of a very complex shape.

Saturday, April 21, 2012

Distortion Issue Solved!

Distortion issue is caused by the inaccuracies of the ray marching method. The distance based marching does not provide a good enough approximation of the shape.

The solution is to apply a "smoothing" constant having a value between 0.0 to 1.0. This number is simply scales the distance estimated sampled at every step, such that the ray will only march a certain % of the distance. So no smoothing would be 1.0, stepping the whole distance towards the scene.

This is a balance between quality and performance. Smoothing eliminates the rippling distortion effect. However, now that we're taking a non 100% of the distance sampled, we need to take more steps in order to reach the scene.

The suggested smoothing level is 0.5, but I'm afraid performance would take a hit since now I'll have to take many more steps in order to render the edge details. A good number that I empirically came up with is 0.75, meaning the ray march would only march 75% of the distance closest to the scene.

Below are examples:
The twisted cube. Smoothing at 0.75. 
Some minor rippling effect still visible at lower left corner, but is much better. 

The Julia quaternion fractal. Smoothing 0.5.
Now smooth everywhere compared to before where there were gaps in the surface.


Distortion Issue

The distortion issue becomes worse when trying to render increasingly complicated objects.

Just as a test, I ported another shape form the.savage's renderer, the Julia quaternion fractal. It was able to run at ok performance at few iterations of the fractal. However, the distortion problem becomes  lot worse and the shape is barely viewable.

5 iterations

10 iterations. Shape barely recognizable.

At this point, I would like to shift the focus from the actual modeling of fractals back to the rendering. I have been trying to read up on fractals but the math is making it a very difficult and a slow process, and right now I still don't have a good understanding.

Since now I don't have too much time left, I'd rather focus on the renderer and its performance, especially since I have just discovered there's much performance yet to be squeezed out (see last post.) I also have a few more effects that I would like to implement, such as glow, reflection, real soft shadows, and focal blur.

I feel that going in this direction is much more relevant to this class than trying to construct fractals. Going forward, instead of trying to generate my own fractals, I would port existing fractal code from various resources as test target renders.

Slow Progress + Issues

Worked on the code a bunch today. I'll quickly run through some of the issues.

Implemented the recursive tetrahedral outlined here. However, it is represented in points, and is not appropriate for this framework. So I decided to remove it. Below's a render of the fractal using the number of steps.


Next was to reverse my last change for the branch optimization that I blogged about. I just did a few tests and realized that when I flip the camera such that it is under the ground plane and it would only render black, I noticed a FPS increase of 2-3. This is because of screen space coherence and warp termination. There is branch diversion during whether it would render or not, and when enough pixels do not need to render, there is a performance increase.

Next I ported a knot shape code from the.savage's renderer from his renderer in GLSL Sandbox. Performance took a huge hit. Result below:


Then I realized that his renderer does something quite smart. He uses a circular bounding volume, and his renderer only renders what is inside the volume. It works for him since he only renders single floating objects in the middle of the screen. I implemented this into my own pipeline. It was a huge performance boost, over double the FPS. And if I zoom out such that the bounding volume occupies a even smaller portion of the screen, I see significant performance increase, from ~18 FPS to up to 90 FPS, again, due to coherency and warp termination. However, this technique is not too suitable for the types of images I'm trying to render since it crops only the center area of the scene. Here's a result:


I'll have to think about whether to use this technique, since it does provide a very significant performance boost.

Next, I discovered that my renderer has a huge issue in that for certain shapes when viewed from certain angles, there are banding / rippling distortion errors. I spent a long time looking at it but still cannot find the answer. I might have to go ahead without solving this issue since time is running out and I'd rather focus on other things. Here's an example:

Inline image 6


Thursday, April 19, 2012

Initial Test + Micro Optimization

Implemented Inigo Quilez's menger sponge, by following his tutorial. This is to test if the framework can handle scenes that are getting more complex. The frame rate is still acceptable, on my puny laptop graphics card.


I also implemented a micro optimization that came to my mind. Before I had:

if (t>0.0) {
  // compute col
 
  gl_FragColor = vec4(col, 1.0);
}
else {
  gl_FragColor = vec4(0.0, 0.0, 0.0, 1.0);
}

Instead, I use built-in functions to eliminate the branching altogether.

t = max(sign(t), 0.0);
gl_FragColor = vec4(t*col, 1.0);

I'm not sure if this helps performance, might be by a difference of 1 fps at the moment.

Wednesday, April 11, 2012

So Much Math!

Found a great resource on rendering fractals, written by Mikael Hvidtfeldt Christensen, who is a physicist and a software developer (and apparently an expert on fractals rendering.)

http://blog.hvidtfeldts.net/index.php/2011/06/distance-estimated-3d-fractals-part-i/

He wrote a 7-part (so far) article on rendering fractals. His series is almost a one-stop resource for all things related to rendering fractals, covering topics from coloring and lighting, to complex math associated with generating different types of fractals, such as Julia sets and Mandelbulbs.

Most of the rendering part I have already figured out from various other sources, but it is a great read nonetheless, and has given me a few more ideas on various rendering passes. The part that is most useful is the part on modeling and generating fractals. This opened up a whole new area that I am completely new to. There is a tremendous amount of math involved, and it is a rather difficult read. A lot of the math I do not understand, and I am still working on the reading and figuring it out.

I only wished I had found this blog earlier!

Here are some amazing images from stuff he's working on. This guy's a true expert!
http://www.flickr.com/photos/syntopia/

Tuesday, April 10, 2012

Check Out Live Code!

Quite satisfied with the rendering results. Go to http://iamnop.com/raymarch/ for some nice real-time live code! (Hint: it's animated!)


Observed Performance Difference

With the full shading stack, rendering each frame becomes much more heavy, and performance differences become greater.

From observation, when viewport is mostly sky (far distances), the frame rate is about 30 fps. When the viewport is mostly ground or geometry (close distances), the frame rate jumps to about 50 fps. This is good news, since it implies that the ray marching loop is correctly optimized, where it successfully terminates when an intersection is found. I was not able to observe this difference until now.

Combined Render Passes

I have tweaked and fixed up various shading passes, and I think I am ready to move onto the modeling part of the project.

Here are the components of the shading:

  1. Diffuse lighting
  2. Soft shadows. Used instead of ray traced shadows. Also eliminates the need for ambient occlusion.
  3. Subsurface scattering (so called). I figured it looks more like effects of depth volume rendering, not quite like subsurface scattering, but can account for some types of a similar effect.
  4. Fog. Mainly used to hide numerical errors for large distances. Instead of light blue (or other fog color), can be set to black to simulate view-aligned lighting. 

Here's the current output:


Thursday, April 5, 2012

Initial Subsurface Scattering

Implemented subsurface scattering based on sample code from Mazapan. The code again is similar to the technique for ambient occlusion. It samples distances along the marching ray. However, since it relies on negative sampled distance, it only works on signed distance fields (for example, it doesn't work with udBox).

Here's an initial result.


Tuesday, April 3, 2012

Soft Shadows

Implemented soft shadows. The technique is very similar to ambient occlusion. Instead of taking samples along the normal at the surface, it takes samples along the ray from the surface to the light. This roughly estimates the distances of the surrounding object to the ray of light, creating an effect very visually similar to soft shadows. Therefore, this is "fake" empirical soft shadows and is purely geometry based.

Here are some results of just the soft shadows component. I personally think they look very nice, and I am questioning the need for the diffuse lighting component at all.


Ambient Occlusion

Implemented ambient occlusion, based on method proposed by Iñigo Quilez. The method is originally based on another paper, "Fast Approximations for Global Illumination on Dynamic Scenes."

Here's how the method works: the ambient occlusion coefficient at each surface point is computed by taking samples of the distance field at varying distances above the point long its normal. This essentially estimates the "openness" of the region above the point. Here is a more formal mathematical description:


Here is an output of just the ambient occlusion term.


Here is ambient occlusion with diffused lighting.


Also, I want to point out that, with ambient occlusion implemented, there is an unintentional "skyline" effect where the ground plane ends. This could be because the ray does not intersect anything and therefore the normal is undefined at those points. However, it does provide a nice gradient visual effect, where before there were curved bands going across as a result of numerical errors. Here's a better picture of the "skyline".


Wednesday, March 28, 2012

Links

Live Code
http://www.iamnop.com/raymarch/

Git Repo
https://github.com/nopjia/WebGL-RayMarch

Looking Better!

Just as a test, to see if a good output image is possible.
  1. Added fog as an exponential function of ray distance.
  2. Increased maximum steps to eliminate numerical error artifacts.
The output looks nice, but the performance also took a big hit. 

Since more steps produce better results, now I know an area of optimization is definitely in the balance of maximum step number and maximum distance. Something to look into further down the road.

And here's a screenshot.


Diffuse Lighting

Added basic diffuse lighting!

The frame rate is still pretty good. The picture does look pretty funky at the moment though, especially around the edges and very far away when ray marching hits the maximum steps.


Playing with Various Functions

Played around with various distance functions from
http://www.iquilezles.org/www/articles/distfunctions/distfunctions.htm

The screenshot below uses the udRoundBox primitive and the repetition operator. The frame rate is pretty high, possibly due to the newly revised ray marching loop. This also shows that increasing the number of shapes does not affect performance at all since this is an implicitly described scene. Later on, when the distance functions become more complex the performance might take a hit.


Variable-Length Loops

Something from Monday's lecture triggered me to investigate variable-length loops in GLSL. It is a limitation in GLSL that loops must be of a constant length, i.e., iterating from a constant defined number to another, so that the length of the loop is determinable at compile time.

This becomes a problem for this project since the whole point of this ray marching method is to minimize the number of steps taken per ray. So I decided to investigate the use of breaks to terminate loops. The GLSL limits only the maximum length of the loop, but forward branching with breaks are allowed. However, this turns out to be more tricky than it seems. As I learned from previous semester GLSL (especially GLSL ES 1.0) is often quite mysterious: sometimes thing will stop working if GLSL decides "it doesn't like it." There are many more limitations that are not written in the documentation.

In the end I managed to make breaks work in for loops. The result is a minor performance improvement, of a few FPS on average. I expect the performance improvement to increase as I scale up the maximum number of steps to do ray march; right now it is set to only 32 steps per ray.

For the breaks to work, there were two requirements that I had to have: 1) use "if else" instead of "if", and 2) place the "break" in the "else" statement. Now you can see a little bit how GLSL can be very strange at times, but it is what it is. Here's some code that demonstrates my point #2 above.

Working code.
if(h >= EPS)
  steps++;
else
  break;

Does not work.
if(h < EPS)
  break;
else
  steps++;

Friday, March 23, 2012

Inversed!

Actually, the pixel values are flipped! It should be darker where more steps are taken, as it makes more sense (also visually) that darkness counts steps.

Here's a new picture (much nicer!)


What's curious about this is why it takes a single step (or very few steps) to where there is no shape. I'll still have to figure this out.

Thursday, March 22, 2012

Setting Up Framework

I spent this week reading up on the variable-step ray marching method and distance fields. At the moment I am still trying to wrap my head around distance field functions and how they represent geometry, since it is quite an unintuitive method of describing shapes.

What I also did this week was to set up a rendering framework on WebGL using GLSL. I draw a single rectangle in the scene as a viewing plane, and output of ray marching will be displayed on this rectangle through its shader material.

What I have so far is very basic per pixel ray marching in GLSL. I am only concerned with my ray marching method at the moment, which means I have not done anything on the rendering side yet, i.e., I have no shading of any kind. I am simply outputting the number of steps taken to intersect the scene as gray-scale pixels. I am testing with the most basic shape, the sdBox() (function given here.)

Here's what it looks like now. It basically shows a depth map of the scene from the camera. Runs pretty smoothly at real-time frame rates on a small enough resolution (my laptop is also very outdated.)


Wednesday, March 14, 2012

Number of Steps in Ray Marching

Thanks to Patrick for his great suggestion.

Since I am concerned with performance, I should also be aware of the number of steps marched by each ray, and should provide a way to visualize the number of steps marched for each pixel. This should be able to be easily implemented as another view mode.

Ray Marching Distance Fields in Real-time on WebGL


I am interested in the topic of real-time rendering on WebGL. For my CIS 565 final project, I will explore a method to quickly visualize and render implicit surfaces. This method is ray marching of distance fields.

Ray marching is a rendering method most commonly used in volumetric rendering. The method is similar to ray tracing where a ray is casted into the scene for each output pixel. The ray takes discrete steps and at each step samples the density, which then finally translates to pixel color.

The ray marching method is then used to render a scene described by a distance field. Composed of one or more distance functions, distance fields describe the shortest distance from any given point to a surface in the scene.

Together, ray marching and distance fields provide an efficient method of rendering mathematical surfaces, such as constructive solid geometry, or more complex shapes that cannot be easily determined, such as recursive shapes and fractals.

Here’s how the method works. For each output pixel, a ray is casted into the scene. It then samples the distance field to determine the shortest distance to any point in the scene. This distance is equivalent to the maximum distance the ray can step without intersecting any surface in the scene. The ray takes a step equal to this distance and repeats the process until it can no longer take any more steps. This adaptive step size is fundamental to the efficiency of this method.


Moreover, because of the stepwise nature, the ray marching method can be extended to support ambient occlusion shadows and subsurface scattering.

The focus of this project is the robustness of the renderer itself. It should be able to render the scene in real-time, and it should be able to handle multiple types of distance functions. This includes CSGs, recursive shapes, fractals, and any other procedural shapes. In addition, it should be able to render the scene with ambient occlusion and subsurface scattering.

The renderer will run in the browser on WebGL. I am planning to use Three.js library to set up the framework. The rendering work will be done on the GLSL shader, and the output shaded onto a viewing-plane quad.

If time allows, I am planning to explore more complex surfaces such as recursive shapes and fractals.


Sources:

Iñigo Quilez, “Rendering Worlds with Two Triangles”

Iñigo Quilez, Distance Functions

GPU Ray Marching with Distance Fields


D.J. Sandin, others, “Ray Tracing Deterministic 3-D Fractals”